

EUのVAT法はB2Cビジネスのデジタル商品に適用されます。WooCommerceストアのVAT税率を確認し、適切な金額を請求できるように設定してください。このチュートリアルは、デジタル商品の税率設定に役立ちます。
デジタル商品を配布する場合は、WooCommerce の適用税率に VAT を追加する必要があります。
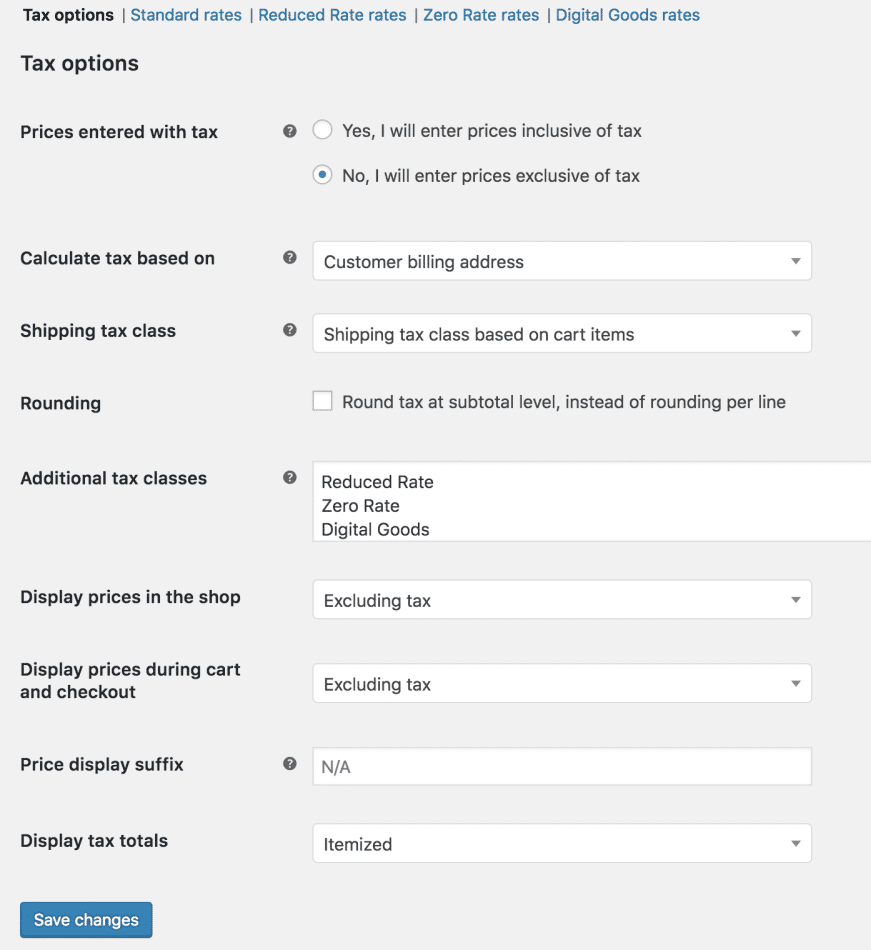
ショップにデジタル商品と通常商品の両方がある場合は、新しい税金クラスを作成して使用を開始する必要があります。

Setup EU VAT rates:
1. Go To: WooCommerce > settings > tax.
2 Select the additional tax classes setting.
3 Add a new tax class to the list.
4 Save.
保存したもの。この税金クラスをデジタルストックに割り当て始めることができますが、最初に税率を挿入する必要があります。
ここで、EU VAT 税率を WooCommerce に入力する必要があります。
Look Up the Latest VAT Rates
The current VAT rates can be found at the ヨーロッパのウェブサイト in a PDF文書. You need to improve the VAT rates for your shop if these rates are changed.
Input Rates
1. Now you navigate to: WooCommerce >> Settings >> Tax >> Digital Goods (Now a new tab will show after you generated a new tax class).
2. Fill in rates for all EU members position. See our control on Setting Up Tax Rates in ウーコマース
Previously, they were as mentioned below for some of the countries:
You can also import the VAT rates only if you have the CSV file in the correct format. The above-mentioned rates can also be accessed through this file: 税率.csv
To have this file, click the “Import Rates” button on the tax input page, and an importer will be displayed.
レートをインポートすると、次のような表が表示されます。
EU の VAT 税率システムでは、デジタル商品税区分の製品を購入したユーザーには、店舗所在地ではなく、その所在地に定められた税金が課せられます。
この税金クラスを WooCommerce のデジタル結果に登録するには、以下の手順に従います。
1. Go To: Products > Products.
2. Edit a product.
3. Now select the digital goods from the tax class dropdown.
4. Save.
商品を一括編集することもできます。
1. Go To: Products > Products.
2. Now click the box to the left of each of the products you want to bulk edit.
3. Select Edit from the bulk actions dropdown.
4. Click apply.
5. Set your tax class in the dropdown box.
6. Click update.

"*" indicates required fields

"*" indicates required fields

"*" indicates required fields
You must be ログイン to post a comment.